Fermenting Vegetables at Home | Simple Guide in 7 Steps
Fermenting vegetables at home is simple and fun! And recipes are normally very flexible. This particular batch developed a tart, acidic, complex taste, with hot ginger notes, and medium crunchy veggies. Absolutely delicious!
Ingredients
This batch was about 10 lb. (5 kg.) For smaller batches, just follow the main idea and you should be fine. Cabbage makes up 50-75% of the veggie mix; it’s cheap and easy to ferment. With the other veggies you can freely improvise.
I used the following veggies:
- Green cabbage: 40% (use hard, tightly packed heads)
- Red cabbage: 20% (adds a beautiful color)
- Fresh ginger root (superb when fermented)
- A few red bell peppers (remove seeds)
- Fresh coriander leaves (I use a lot!)
- A few green apples (remove seeds)
- A few fresh, whole fennels
- A few sweet potatoes
- Carrots
- Salt
Optional: A few celery bunches to make fresh juice. Fresh celery juice helps preserve the veggies and also adds a great taste. But the fermented vegetables will not taste just celery.
Step 1: The culture starter
When fermenting vegetables at home, I always recommend using a culture starter. Here I use Body Ecology starter.
A good starter…
- creates more probiotic bacteria,
- promotes faster fermentation,
- protects against mold,
- stabilizes the process,
- tastes better.
Prepare the starter
One packet is usually enough. But for bigger batches like here (10 lb.), use two packets to speed up the process and create more bacteria.
If you have a juicer, prepare fresh celery or cabbage juice. Dissolve the starter powder in the juice. If you don’t have a juicer, follow the instruction on the starter box. Let the starter-juice sit while moving on to step 2. This gives the bacteria time to wake up.

Body Ecology culture starter 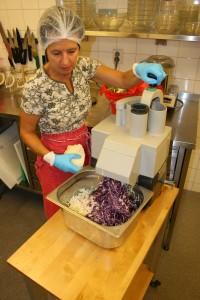
Shredding 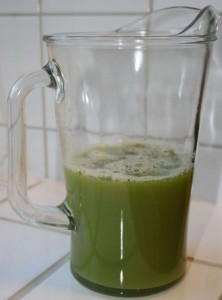
Celery juice starter 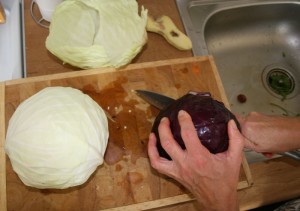
Green and red cabbage
Step 2: Rinse and shred vegetables
Leave one whole cabbage leaf for every jar; we will need them later.
Rinsing
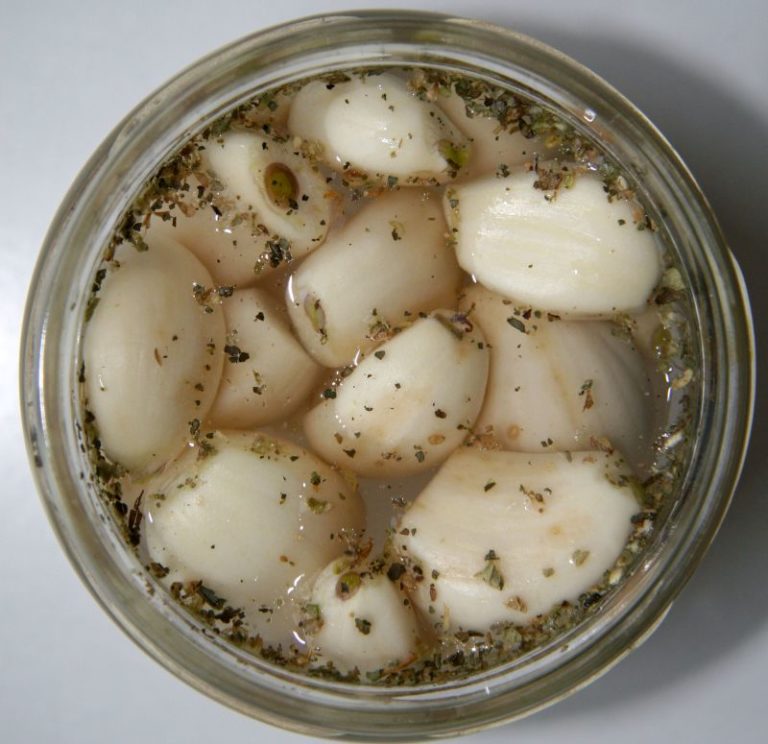
Rinse the vegetables thoroughly even if you use organic produce. Avoid bleach as it harms the natural microorganisms living on the veggies. A natural fruit and vegetable wash or vinegar is fine. We don’t peel organic produce like ginger and sweet potato.
Shredding
We use a professional food processor to speed things up. However, for smaller batches it’s fine to shred by hand. Put all of the shredded vegetables into a bowl where you can mix them easily.
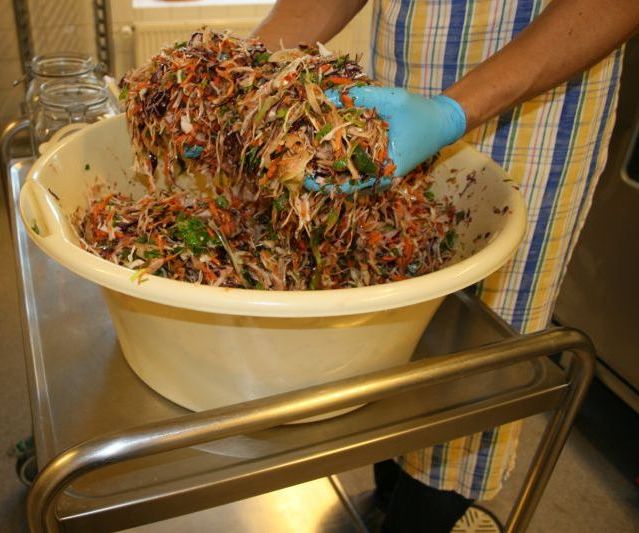
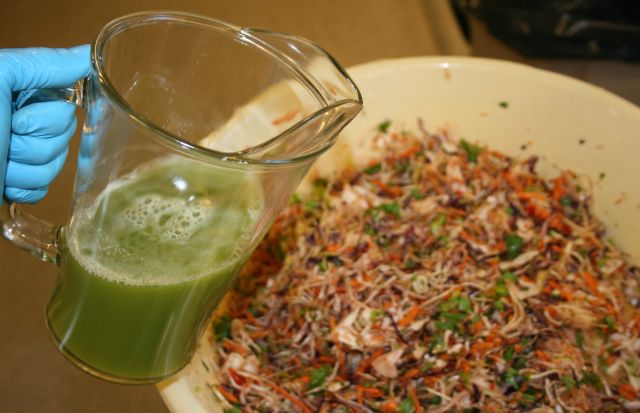
Step 3. Add the starter juice to the mix
The starter culture juice has now been sitting for 20+ minutes. Pour the juice over the vegetables and mix thoroughly.
NOTE: This is a good time to add salt. How much? It’s a matter of taste. I add about 1-2 tablespoons per quart of veggies.

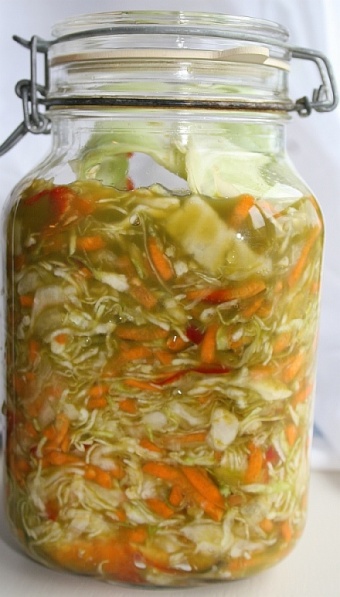
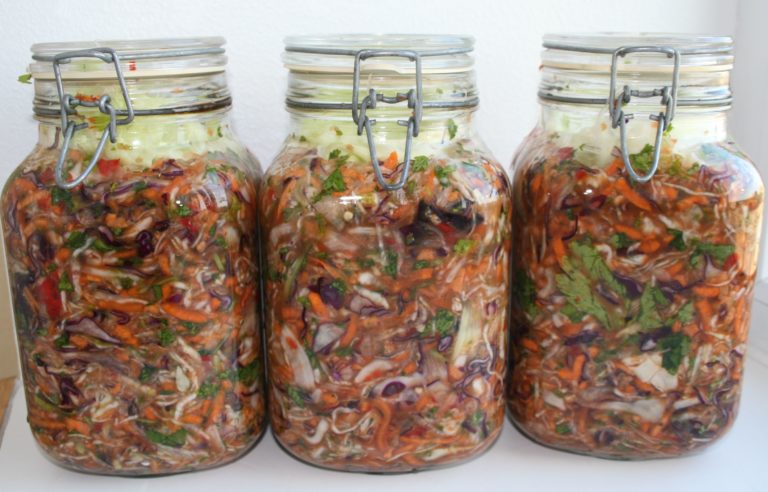
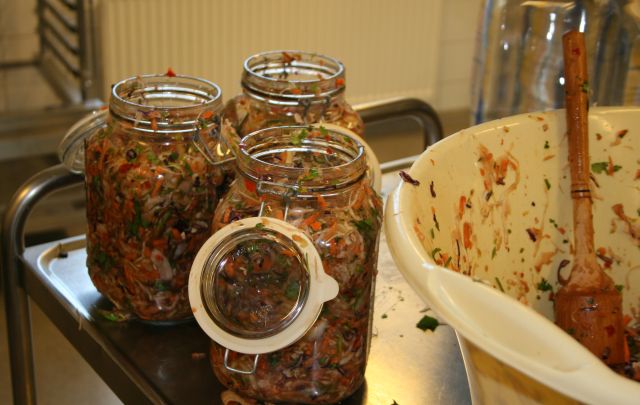
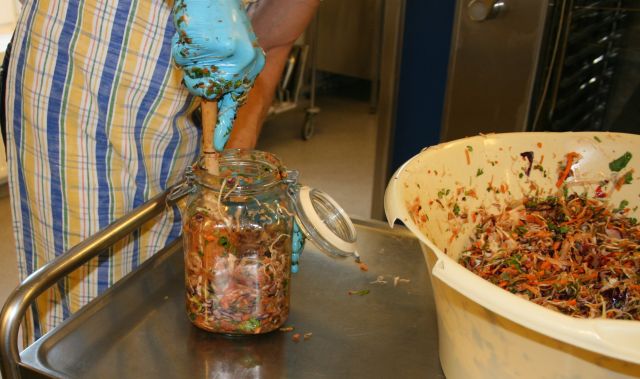
Step 4: Packing vegetables in jars
Press and pack the veggies hard in the jars to force air out. Try using a kraut-pounder (looks like a small baseball bat). Or just use your fist.
Fill the jars with veggies only up to 75%. During fermentation the brine will raise and leak out of the jars; this is normal. The empty space left left in the jars releases some of the pressure. All the juice left in the bowl should be added to the jars.
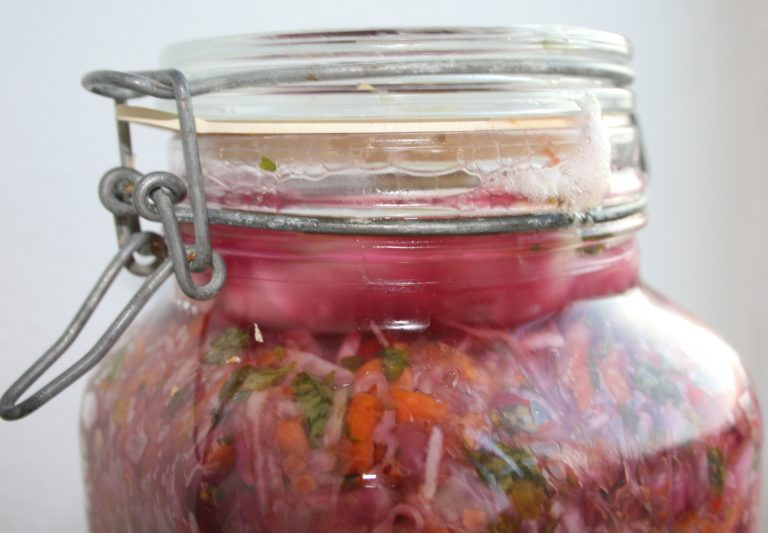
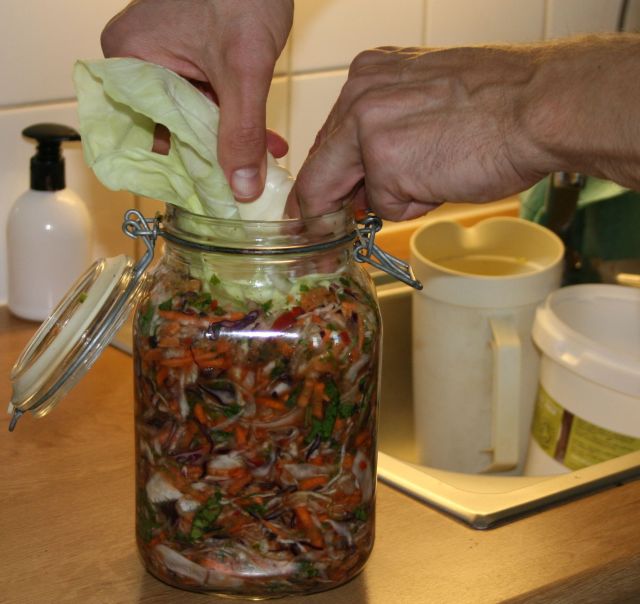
Step 5: Add a cabbage leaf on top
Put a cabbage leaf on top of each jar to help keep the vegetables submerged in the brine. The absence of oxygen is vital for a successful fermentation.
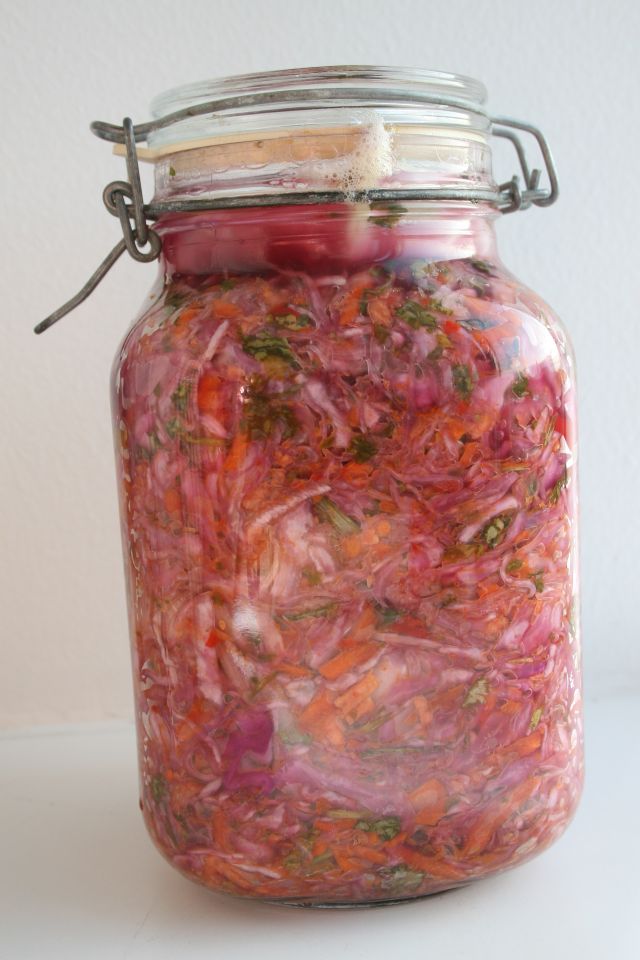
A a beautiful sight! Now the jars should be stored at room temperature for around 7 days to ferment. Fermenting vegetables at home means you will observe the process firsthand. This includes bubbles in the jars on day 2 or 3 as well a subtle smell.

Step 6: Fermenting the vegetables
When fermenting vegetables at home, brine can leak out so store the jars in a kitchen sink or bathtub. If you use Mason jars, don’t screw the lid on too tight during the first few days to allow gas to escape. You can also open the lid for a second to let pressure out now and them.
How long should you ferment vegetables at room temperature? Aim for 7 days. Taste the fermented vegetables to determine when they are ready.
Ideal temperature: 68-75 degrees (20-24 C.). Lower than this slows down fermentation. In such case, let the veggies ferment a few days longer.
Max temperature: 83-85 (28-29 C.). At higher temperature, it might suffice to ferment for 5-6 days as the risk for mold increases. The veggies might also become more mushy. Mushy veggies are fine to consume, just not as nice as crunchy. Adding more salt might help protect the vegetables.
Step 7: Store fermented vegetables in a cool place
When you are happy with the taste, move the jars to a cool, dark place. A fridge is fine. The veggies are ready to be consumed right away.
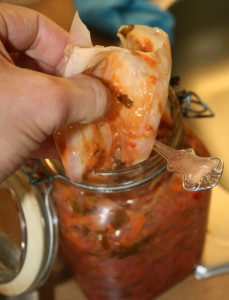
When you open a jar to consume the fermented vegetables, discard the cabbage leave on top.
What if brine levels are low and not completely covering the vegetables? If you consume the jar fairly quickly, you don’t need to do anything.
Otherwise, add a little water with salt.
How long can you store fermented vegetables?
When fermenting vegetables at home, the product can be stored for months. The veggies might turn softer but they remain fresh for a long time.
After some weeks, the taste slowly gets more tart and acidic. But the taste also turn more complex. Fermented vegetables is living food.