How To Prepare Kefir at Home | Surprising Kefir Variations
How to prepare kefir at home. Very simple—in less than 24 hours the kefir is ready to be consumed. Yogurt and kefir are both fermented milk products with similar taste, though kefir often contains more microorganisms that yogurt.[ref]The Magic of Kefir[/ref]
I love the feeling that you’ve actually prepared the kefir yourself. Check the FAQ below about a how to do a second kefir fermentation if you want to try something extra.
What is kefir?
Kefir is produce with different microorganisms than for example yogurt. That’s why the taste also differs. Kefir is prepared from sheep, cow, goat, soy, or coconut milk. You only need a starter culture and whatever milk you choose. The starter culture contains the microorganisms that control fermentation and produce the unique taste.
Summary: Kefir prepared at home becomes more liquid than commercial yogurt which is heavily processed. The kefir is refreshing, low in lactose, and easy to digest. After a second fermentation, the kefir acquires more taste and develop a number of additional compounds.
Kefir starters

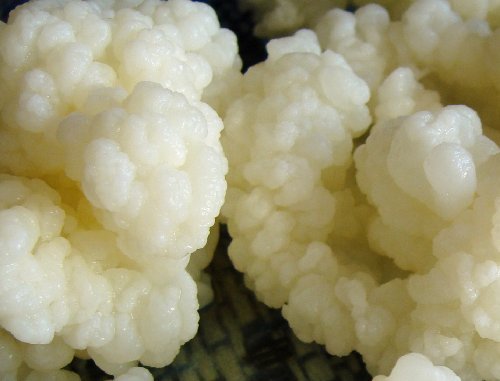
A traditional way to prepare kefir is by using kefir grains. The kefir grains a great diversity of microorganisms. And they are very cost effective as you can use them indefinitely. Another kind of starter is a powder that is added to the milk. These two types of starters are used differently.
The different kefir starters have in common that they are a complex, symbiotic colony of bacteria and yeast. When this colony is added to milk, they start producing compounds such as organic acids, bioactive peptides, exopolysaccharides, hydrogen peroxide, ethanol, diacetyl, and bacteriocins.
How to prepare kefir
You need only two ingredients.
- Full-fat milk. Try raw milk as I do here. Commercial goat or cow milk is also fine. The milk used here contains 4.3% fat for a creamier kefir.
- A culture starter (like kefir grains). There are many starters around and this time I tested an inexpensive starter called Yogourmet Kefir Starter. The kefir turned out nicely. I normally use Body Ecology starters.
Use an old batch to start a new one
This is a cost-effective way to prepare kefir. Just remember: Making kefir is not rocket science and problems may occur. A few things to keep in mind:
- This works best with kefir grains but might not work well when using a powder starter culture.
- Don’t transfer too much kefir from the old batch or you risk accelerating fermentation too much and this can make the next kefir batch taste too sour. Usually 4-6 tablespoon from the old batch is enough to start a new one.
- Keeping the kefir too long at room temperature can ruin the batch. The warmer the temperature, the faster it ferments. If you wait too long it can turn sour and lumpy.
Kefir should be a little thicker than milk which takes 18-24 hours depending on room temperature. Done correctly, up to seven “transfers” from an old batch is possible. However, with kefir grains there are no such limitations, but you can make homemade kefir with probiotics for years.
The exciting second kefir fermentation
When the kefir has fermented the first time, open the jar and add a few pieces of fruit or some berries. Don’t add too much as the taste might become too acidic. When you have added your favorite ingredient, let the kefir sit for 8-12 hours at room temperature. When ready, you might want to remove the flavoring. The kefir should be consumed within a few days.
With a second fermentation, the kefir becomes less sour and the lactose content is reduced. The flavor develops and more nutrients are formed.
You can make it spicy, sweet, or bitter depending on your taste. Popular flavors include the following: Citrus fruit peels; vanilla beans and cinnamon; mint; lemon grass sticks; chai tea bags; a few garlic cloves makes a nice kefir dip. Use ingredients that can be easily removed when it’s done. This does not apply of course to ground spices, cocoa powder, and similar.
FAQ
In the fridge, the kefir might separate (happens often in the summer). You can se a transparent liquid on top which is the whey and the curd at the bottom. But the kefir has not gone bad, it’s just a little too fermented and the taste more sour. However, it’s still a highly beneficial product. Just stir and mix it up and the kefir is ready to drink.
Five to seven days. Keep the kefir air-tight to prevent it from being affected by other strong-smelling food. It helps to keep a lower temperature in the fridge.
Yes, this works well with kefir grains and some starters (it’s harder when fermenting vegetables). Try using around 6 tablespoons of the old batch and mix it with the new one. Let it stand at room temperature for 18-24 hours, then refrigerate.


